Elotes and the Easiest Burgers in the World

Tags

, ,

The last two weekends have been sunny where I live, which means getting to go outside and do all the work you’ve been shirking for weeks “because of the rain.” For me this meant being a Serious Mountain Woman and cutting down trees. And nothing makes you feel like a total bad ass who should be crushing beers and grilling like strenuous outdoor activity. So that’s what I did.

But you see, there are so many amazing things to cook on the grill, and most of them require a little prep. It’s easy to aim for dinner at 6 and not end up eating until a million hours later. So if you want to make your burgers, you need something simple. This is where Jessicat comes in. She realized that the principles that result in those glorious chickpea cutlets apply to pretty much any bean situation you can imagine, leading to:

The Easiest Burgers In The World

Servings: 4 patties

  • 1 16oz can of baked beans or chili
  • ~1/2 c gluten (this will depend on the wetness of your chosen beans)
  • ~1/2 c bread crumbs (ditto)

First, open the can and put an immersion blender in it. Yep, right in the can. Blend a bit. You can go for totally smooth or just partly mashed–both work, but partly mashed has a more interesting final texture. Pour the blended beans into a bowl and stir/knead in the gluten and breadcrumbs. Taste the dough and see if it needs additional seasoning, especially salt. Since baked beans and chilis vary wildly in seasoning, this is your chance to adjust it. Pat out some burgers, grease them on both sides, and put them on the grill. I have never had an amazing homemade veggie burger, but these really do what they ought to for a minimum of effort: provide a flavorful (but not overwhelming) base for amazing toppings and condiments.

Since those burgers take like 15 minutes to make, you’re free to work on all the other foodstuffs that make grill days so great. You know, like elotes (also known as):

Mexican Street Corn

  • corn on the cob, shucked
  • vegenaise (1-2 tbsp per cob of corn)
  • fake cheese of your choice (about 1 tbsp per corn)
  • salt n’ peppa
  • finely chopped cilantro and garlic (optional)
  • ancho chile powder (cayenne + a little smoked paprika works in a pinch)
  • lime
  • hot sauce

Mix together vegenaise, fake cheese, salt, pepper, cilantro, garlic, and chile or pepper powder. Smear it all over the cobs of corn, then wrap each securely in tin foil. Put the wrapped corn on a very hot grill, turning it every few minutes until all sides have seen heat. You want the corn to be a little blackened on each side, so don’t be shy with the cooking time here. You can also grill the corn first and smear goodies on after, but the cheese won’t get as melted.

When it’s done, unwrap the corn, squeeze a little lime all over it, add a little hot sauce, and munch. You seriously may never willingly eat plain corn again.
Short and Savory: Green Onion Cakes

Tags

, ,

These aren’t as easy as the last short and savory (I mean, what could be), but they do have the same kind of desperate feed-yourself-when-drunk/hungover appeal. They’re also so foolproof and delicious that you can whip them up for unexpected guests or a last minute potluck (if you’re being a lazy jerk).

Green Onion Cakes

Servings: 1 – 4 (meal vs. snack)

  • 1 c flour
  • 1 tsp salt
  • 1 tbsp oil
  • 2 tsp yeast
  • ~ 1/2 c water
  • 3 green onions, sliced
  • additional salt and oil

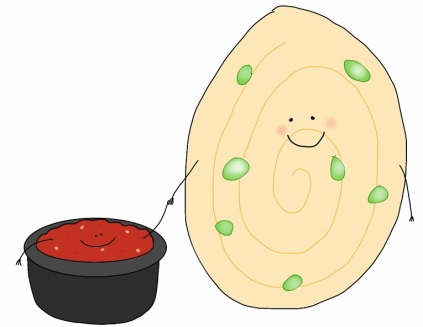
There are two ways to make these, depending on how greasy, salty, and pull-apart-layered you want them. The easier option is to mix everything together (except the additional salt and oil), knead it a bit, make snakes of dough, roll them up like cinnamon buns, smoosh the buns flat, and fry ’em. This is totally acceptable. Fried dough is always delicious, and you’re probably too hungover to appreciate the difference between this and the harder version.

The harder version is designed to give you more salt and fat, and nicer layers with nooks and crannies for scooping up sauce. Plus, they’re not that much harder. You mix the dough ingredients (so everything except the onions and additional salt and oil), and knead it a bit. Make little snakes of dough and then roll them flat so you have long strips (maybe 1 1/2 inches wide). Dip your fingers in oil and grease the part of the strips that are facing up. Use the same method to rub the greased part with salt (use your judgment for how much). Sprinkle the dough with green onions, then fold it in half over the onions “hot dog style” and seal it. Roll your stuffed snake up like a cinnamon bun. Try to have everything sealed, then roll the bun flat. Some onions will squish out, that’s okay. Finally, fry ’em up.

All versions should be eaten with buckets of chili garlic sauce. These can also be made in big batches and frozen raw (between layers of plastic wrap or paper) for emergency use later. Because, yes, there is such thing as a green onion cake emergency.

Burrito Confessions and Nacho Cheese

Tags

, ,

You know when I was talking about how I don’t always eat tofu, even if I post about it a lot? I don’t post about what I actually eat because it’s like 90% burritos. Well, not quite that high. But consider it telling that I ate burritos for both breakfast and dinner yesterday. And dinner the day before. And possibly breakfast the day before.

Part of the reason is that dry beans are cheap and I love my pressure cooker. Another part is that I grew up in the American Southwest and burritos are comforting and make sense to me. When I lived in Canada, I would fly back with 8 dozen+ fresh tortillas intending to freeze and ration them for months, and then eat them all within weeks. And I did this many, many times.

Needless to say, at this point I don’t do a lot of modifying to my burrito routine–I’ve got them pretty well figured out. But that’s why I have to do this post. Yesterday, I tried something different, and it was amazing.

I’ve been trying to look through other Mofoers’ blogs as much as possible because we’re all working hard and I really want to see what everyone is up to. In my browsing, I found this recipe by Queen V, and immediately needed that glowing orange nacho cheese in my face.

Here’s the problem. I don’t own the sort of high-speed blender you’re supposed to use for these nut/seed cheeses. I don’t even own a regular blender. I have two tiny $20 food processors, one with an immersion attachment.

This is far from ideal, because the recipe calls for blending raw pepitas (pumpkin seeds) in a fair amount of water. Some might say more water than one should put into a tiny food processor. Naturally, the processor and I ended up so thoroughly drenched in pepita water that I was genuinely a little worried about being electrocuted. So I switched to immersion blending the water/pepitas, which had pretty much the same effect in terms of ambient moistness, but fixed the worry about electrocution (which is admittedly something).

I didn’t get quite the creamy texture you can probably expect with a nice blender, but the sauce actually turned out anyway. And by turned out, I mean changed my life forever.

So here’s the (slightly modified) recipe. Please, please try it if you have any sort of choppy device, and then run and tell Queen V how much you loved it.

Queen V’s Pepita Cheese Sauce

  • 1/2 c raw pepitas
  • 1 1/2 c water
  • 1/4 c roasted red pepper
  • 3 tbsp nooch
  • 2 tbsp corn starch
  • 1+ tbsp lemon juice
  • 1 tsp salt
  • 2 heaping tsp onion powder
  • a splash or two of pickled jalapeno juice

Note: Queen V includes 1 tsp turmeric for the color, but I don’t own turmeric. The cheese still turns out a pleasant light orange without it, though.

To make the sauce, blend all the things and then cook them in a pan until they thicken. Then, hurriedly make a burrito so you can fill it with the sauce. Add some Frank’s red hot and ranch to the burrito too, because hey, let’s go for broke.

Voila: you have the perfect junk food burrito.

You Oughta Know: Happy Vegan Chocolate Chip Cookies

Tags

,

You may have noticed that I haven’t posted a single sweet thing all month. I’m sorry ravenous dessert beasts, just stop putting cookies in your face for a minute so I can explain. It’s because I have the perfect chocolate chip cookie recipe for you. If I shared it any sooner, you would have stopped reading my blog in favor of eating only these cookies all the time. And honestly, sometimes I think you should get a little more variety in your diet. 

But there are so many good chocolate chip cookie recipes, how could any one possibly stand out? Good question, person I don’t know, and I have the answer. Beyond just tasting like proper chocolate chip cookies, these are about as cheap and quick to make as their non-vegan brethren. On top of that, they involve only ingredients you’re virtually guaranteed to have on hand. Once I learned this recipe, I made these cookies so often I had to deliberately stop buying sugar so that I would stop making them. I am not kidding. I hope that gives you an idea of both how good these are and how much I lack of self control.

You can find the original recipe on VegWeb posted by the lovely Admin, whose real name I wish I knew. Below you’ll find my slightly altered version plus the super secret pro tips that will make these perfect every time.

Happy Vegan Chocolate Chip Cookies

  • 2 c flour
  • 2 tsp baking powder
  • 1/2 tsp salt
  • 1/2 c brown sugar
  • 1/2 c “white” sugar
  • 1/2 c vegetable oil
  • 1 tsp vanilla
  • 1/4 c or more of water***
  • a couple shakes of cinnamon (don’t leave it out, it’s awesome)
  • a handful of chocolate chips (between 1/3-1/2 c)

Did you notice all those stars I put by the water? The reason is that this recipe, more than any I have ever made, is sensitive to the dryness of your flour. This is actually significant enough to screw up these cookies, so bear with me while I explain.

Flour is stored in permeable packaging (paper) and that means it can lose or gain moisture according to its surroundings. If you live somewhere anyone has ever called dry, chances are your flour–by the time you get around to using it–is sort of drier. If it’s drier, it will suck up more moisture when wet ingredients are introduced, which will give you drier dough than the recipe probably wants. The problem is, you won’t necessarily know how dry or moist your flour is until you attempt this recipe. And if you try to add the water after you discover the dough is too dry, it just will. not. work. So, if you live somewhere dry, you need to add 1-2 tbsp more water BEFORE MIXING the wet ingredients in to achieve the right results. If you have any doubt whatsoever about your climate, add 1-2 tbsp extra water just in case. Worst case scenario, you’ll have to bake the cookies longer to get it out.

NOW LET’S MAKE SOME FREAKIN’ COOKIES. Preheat your oven to 350 F / 177 C. Mix together the flour, baking powder, salt, and cinnamon.

Whisk together the sugars, oil, water, and vanilla. You want everything to emulsify. Immediately dump that into the dry ingredients, add chocolate chips, and stir until just incorporated. You should end up with dough that you can wad into a ball and mold without it cracking or crumbling.

Form the dough into roughly 1 1/2 inch diameter balls, smooshing each into a fat disc on your ungreased cookie sheet. Bake them for 10-12 minutes, BUT NOT MORE if you want soft cookies. These tend to look less done than they are (by being lighter in color), but if you cook them till they look done, they’ll be really crispy. Personally, I’m saving my teeth for ice cubes.

If you’re a genuine dessert beast, you might only bake up half the dough and store the other half in the freezer to eat raw. But I wouldn’t know anything about that.

I Am Too Lazy To Chew My Food: Pureed Soups, Part II

Tags

, ,

Last year my lousy brother/best friend stepped on my reading glasses, and I’ve been gluing them together unsuccessfully ever since. This generally means that I don’t get to use them and have to play creepy bat on the computer. So when the boyf requested vegan chicken and dumplings, and I found this recipe, I followed it. But I also misread it, like, multiple times.

The good news is that I misread it in acceptable ways. I saw “5 whole cloves” and put in five whole cloves of garlic, four more than were actually called for. I also saw one cup of wine, not one half (ah, my wishful eyes), missed the fake chicken strips entirely, and somehow convinced myself that this was a pureed soup. That’s pretty much when I called it a night.

Paired with the modifications I made deliberately, I ended up with something a bit different from Tofu Mom‘s recipe, but still owing a lot to it. And I’m glad I at least attempted her recipe because the end result was astoundingly delicious.

Bastardized Chicken and Dumplings

Soup:

  • 6 c fake chicken broth
  • 1 c dry white wine
  • 5 whole cloves OF CLOVES
  • 2 bay leaves
  • 1 large onion, chopped
  • 5 cloves garlic, chopped
  • a few lazy, large shakes of poultry seasoning
  • a couple potatoes, chopped
  • 3 large carrots, chopped
  • 3 large celerys, chopped
  • margarine

Brown onions, celery, and carrots in margarine. Add garlic. When cooked, add every else and boil until done. Remove cloves and bay leaves and puree the soup with an immersion blender. Remember what I told you about regular blenders. Also remember that time I made soup and someone ate the bay leaves thinking they were part of it.

Dumplings:

  • 1 1/2 c flour (half bread flour half whole wheat, because you haven’t been to the store in weeks)
  • 2 tsp baking powder
  • 1/2 tsp salt
  • 1/4 shortening
  • 3/4 c unsweetened, unflavored non-dairy milk (this is the only kind I use)
  • 1 tbsp cider vinegar

Put dry ingredients together, and vinegar in milk. Smoosh the shortening into the dry ingredients with your hands. You don’t have to worry about temperature like you do with biscuits and pie crust because these are delicious doughy.  Make sure the pureed soup is simmering, but on very low heat. Mix the milk stuff into the flour and drop little spoonfuls of the dough directly into the soup. It will probably take up the entire surface, and also look like it’s going to dissolve and ruin everything, but it won’t. Cover the soup and dumplings, and leave it alone for 15-20 minutes. Don’t worry about stirring the soup. Yes, it will sort of stick to the bottom of the pan a little, but not terribly.

After 15-20 minutes, you’ll look into the pot and the dumplings will have, miraculously, visibly solidified. Turn off the heat and let the soup cool for a bit. It’s going to smell amazing, but it’s been boiling for a minute now and you’ll need those taste buds unscalded in order to enjoy it. You’ll find the dumplings tangy, chewy, and so wonderful smothered in creamy, savory soup. Secretly, I hope your weather gets as crappy as ours has been, just so you have an excuse to try it.

Tasty Bedfellows: Cabbage and Mushrooms in Pie

Tags

, ,

I have a feeling that the reason most vegan blogs exist with their normal, pretty food, is to overcome the cultural burden of lentil loaf. The 70s were a weird time for all of us (I personally found non-existence very weird), and the vegetarian food was… not so great maybe.

Of course, that isn’t universally true, which is why I have a recipe for you now. It’s inspired by a cookbook I stole from my dad: The Vegetarian Epicure. No you cannot have it back, Dad.

In the book this recipe is referred to as Russian Vegetable Pie, which makes sense if you’re familiar with cabbage kulebyaka (coulibiac), but not super informative if you’re not. So, I will be calling this cabbage and mushroom pie, because that’s pretty much what it is when you veganize it. Don’t worry, it’s still insanely tasty for a thing of such few and humble ingredients.

Cabbage and Mushroom Pie

Crust:

  • 2 c flour
  • 2 tsp salt (or 1 tsp if you use margarine as your fat)
  • 2/3 c shortening or margarine
  • ice water

Filling:

  • 1 small green cabbage, shredded thicker than cole slaw
  • 1 1/2 medium onions, chopped
  • 1 1/2 pints of crimini mushrooms, sliced
  • 1 tsp each dry marjoram, tarragon, and basil
  • fake cream cheese (homemade is fine here, but reduce the lemon in that recipe)
  • salt n’ peppa
  • margarine

Mix the dry ingredients for the crust and put them and your solid fat into the freezer. Like biscuits, pie crust turns out a billion times better when the ingredients are cold. Pull your cream cheese out of the fridge to warm up for later. Then, start cooking the onions with margarine in a really big pan (you will be adding ALL the cabbage later).

While the onions are going, chop the rest of your vegetables. When the onions are getting brown, turn the heat up a bit, dump the cabbage on top, stir, and cover. This is by far the most awkward part of the whole affair. You have to soften the cabbage most of the way (until it’s starting to turn yellow), stirring occasionally. You are virtually guaranteed to flip cabbage all over your stove. Deep breaths, it’s part of the process. Now, set your oven to 425 F / 220 C.

At this point, get those mushrooms fryin’. When you cook them, do them with oil and don’t add them to the pan until it’s way hot. Don’t overcrowd the pan either, or your mushrooms will be soggy and less awesome. I will be impressed if you own a pan big enough to handle all of them at once.

Once everything is cooked, toss it into a large bowl and add salt, pepper, marjoram, tarragon, and basil. Salt it to taste, just keep in mind that how it tastes now is pretty much how it’s going to taste when it comes out (so don’t be shy with seasoning).

Now crust. Using a fork, knife, pastry cutter, or food processor–but not your warm-ass hands–mix your cold solid fat into the dry ingredients. You’re aiming for chunks of shortening that are pea to dime sized, so not fully incorporated. Add small amounts of cold water (a tbsp or two at a time) to the flour mixture while gently stirring with a spoon until everything starts to clump together. Once it’s sticking together (not sticky, but err on the side of too wet for ease of use reasons), separate it into two balls, one slightly larger than the other. You’re going to roll the larger one out for the bottom crust.

Flour a surface well and get your rolling pin ready. If you don’t have one, a cleaned wine bottle works fine, and I know you have one of those. Flour the top of the dough, then roll it out until it’s a circle about one inch larger all the way around than the top of your pie pan (just hold it upside down over the dough and eyeball it). Roll the dough onto your rolling pin like a fruit roll up, then unroll it into your pan. Don’t worry if it falls to pieces during this, just press them together in the pan. It won’t make a lick of difference because it’s all going to the same place, as they say.

Smear the inside of the pie (bottom only) with 1/2 an inch of cream cheese. Dump the mushroom, cabbage, and onion mixture into the pie. Flour and roll out the top crust and put it on your pie. Pinch the crusts together, poke some holes on top, and pop that baby in the oven. Your pie, I mean.

Bake it for about 30 minutes, starting at 425 F / 220 C then turning it down to 400 F / 205 C after 15 minutes. The filling is mostly cooked already, so you’re really just looking for the crust to be browned and lovely. Then you eat it. That’s pretty much how these things work.

I Am Too Lazy To Chew My Food: Pureed Soups, Part I

Tags

, , ,

I like good food and I understand that it involves a certain amount of subtlety (which I as a person entirely lack). So, on a conceptual level, I get that some things require 20+ ingredients at 1/4 tsp each. But I just… I cannot make those recipes. I will caramelize onions until the heat death of the universe, but I cannot deal with measuring a bunch of shit out. For reasons I don’t understand, it’s just too hard for me, and I have one rule about food: its goodness must be greater than its hardness to make. Even if that hardness is a result of character failings. 

For this reason, during a period in my life where I was waking up at 6:00 in the morning and parking myself in front of Canadian Food Network, I discovered a six ingredient recipe that I immediately, unquestioningly adopted on principle. It’s Ricardo‘s pureed cauliflower soup and it tastes like cheddar heaven.

Cauliflower Soup

  • 1 head cauliflower (cut into largish florets)
  • 1 c leek (one medium leek)
  • 2 cloves garlic
  • 1 potato (peeled)
  • 2 Macintosh apples (peeled)
  • 6 c faux chicken broth

Clean the leek thoroughly and saute it. Add and cook the garlic. Add everything else and bring it to a boil. Turn it down to simmer until everything is cooked through. Puree it, preferably with an immersion blender. If you put too much hot soup in a blender, it will heat up the air inside, causing it to expand and explode off the top. At this point you will be covered in scorching soup puree, and all your roommates will be simultaneously embarrassed by and annoyed with you.

Note: I deeply suspect that adding 1/2 c dry white wine and a couple tbsp nooch would make this amazing soup amazinger, and contribute to it’s phenomenal cheese flavor. I also sometimes roast broccoli with salt, pepper, and olive oil and add that at the end after it’s been pureed. I mean, when it comes to brassicas, go hard or go home, am I right?

Chimichurri On Everything

Tags

, ,

You know when little kids have to pee really badly, and they start dancing and grabbing their shorts in anticipation of the bathroom? I am doing that dance right now in anticipation of telling you about this sauce. I realize that this is not appropriate behavior for an adult.

I first discovered this style of chimichurri at a food truck in Austin called Conscious Cravings. Their chimichurri seitan wrap is so phenomenal you absolutely cannot miss it if you ever get a chance to visit Austin. Their seitan is the perfect texture, and paired with cilantro chimichurri, some lettuce, tomato, and melted Daiya, it can hardly be beat. It goes without saying that I had to come up with my own version or risk bankruptcy.

There are two things I really like about this chimichurri: cilantro is the dominant flavor, and there’s a little mayo to give a creamier texture and pretty light green color. You also get more complex, well-rounded flavors, much like using margarine in the place of oil.

Anyway, enough talk. Here’s the recipe, followed by a few ways to use it.

Cilantro Chimichurri

  • ¼ c vegetable oil
  • ¼ c vegenaise (the grapeseed oil one is best)
  • 2 tbsp lemon juice
  • 1 bunch flat leaf parsley (about 1 c packed)
  • 2 bunches cilantro (about 2 c packed)
  • 4-5 cloves garlic, chopped or crushed
  • ¼ tsp salt
  • A few grinds of pepper

Rinse your cilantro and parsley well. I usually dump what I’m using (minus stems) into a big bowl of water, swish it around, replace the water, and repeat. Remove some of the big stems from your cilantro and parsley, but don’t worry about all of them. You are an amazing, fascinating person with a busy schedule–you have more important things to be doing with your time than fastidiously de-stemming things.

In this case it extra doesn’t matter because the next step is to food process the hell out of all the ingredients at once. If you find things aren’t fully incorporating, try different settings on your food processor. Mine spins the blade two different directions, so I start one way, then switch to the other. Ultimately, the herbs should be turned to confetti in a brilliant light green sauce. If you’re feeling daring, you can also add a little smoked sweet paprika.
You’re going to be tempted to eat this right away and you definitely can. However, it really benefits from resting about 15 minutes or more before serving. There are a lot of strong, fresh flavors in this (the herbs, lemon, and garlic particularly) and they need to mellow out a bit before you get the best out of them. It’s worth the wait.

Now, what do you do with this amazing sauce? Did you even read the title of this post? Geez. Okay, I’ll start you off with three good ideas.

  1. Smother seitan or pinto beans in it and put it in a wrap with tomatoes, lettuce, Daiya, and sriracha.
  2. Put a healthy amount on top of a veggie burger.

Or, 3. make Chimichurri Pizza:

Crust (for one personal pizza):

  • 1 c flour
  • 1 tsp salt
  • 1 tsp yeast
  • warm water

Toppings:

  • Upton’s ground seitan
  • Fake bacon or thin sliced fake ham, diced
  • Diced tomatoes
  • Daiya mozzarella or similar
  • Sriracha to taste

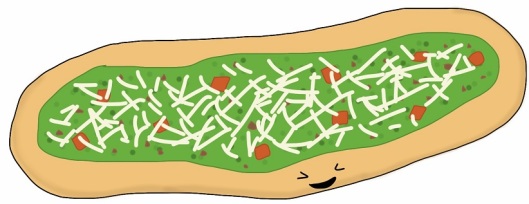
Mix the dry crust ingredients and add enough warm water to get the right consistency. Knead it, roll it out, all that good stuff. You are familiar with pizza. Smear chimichurri all over the rolled dough. Sprinkle with ground seitan, bacon/ham, and a thin layer of Daiya. Bake it in the hottest oven you can manage, or try this if you’re feeling bold. (Just keep in mind that this pizza is much more likely to catch fire than others due to the oil in the sauce. Watch it carefully under a broiler and don’t put it too close.) When done, sprinkle with fresh diced tomatoes and drizzles of sriracha. Boom. Mouth party.

I really hope you try this sauce. Well, at least the sauce, but also the pizza. Chimichurri is just so delicious, AND can be put on everything, AND comes together quickly. I don’t know how much more you can ask for.

Oh wait, nutritional value. That would be nice.

I Can’t Think of One Good Reason Not to Post About Gravy Again

Tags

, ,

I like my breakfast like I like my news shows (soporific), and biscuits and gravy is pretty much the standard for that. I have no earthly idea how this even became a breakfast for people who have things to get done during the day. But, it exists and I like it, so here it is. I mean, it’s Sunday. You should be going back to bed anyway.

Part I: Biscuit Secrets

There are three really easy things you can do to make your biscuits better:

  1. Use aluminum-free baking powder. If you’ve ever noticed that your biscuits have a weird metallic taste, it’s because you’re using baking powder with aluminum in it. Biscuits contain a lot of baking powder and there just aren’t any other flavors in them that can cover it. And, just because, here is a really cool explanation of how baking powder and baking soda work, and why some baking powders have aluminum.
  2. Make your ingredients as cold as possible. One of the things that make biscuits fluffy and pull-apart is that they have pockets of air throughout them. These pockets are created when chunks of shortening that weren’t fully incorporated melt during baking. This only happens if there are pockets of unincorporated shortening. Keeping your biscuit ingredients (all of them) super cold prior to mixing–and then not mixing them with your warm-ass hands–helps with this a lot. Shortening that stays cold will remain separate and won’t saturate the other ingredients.
  3. Do not overwork the dough. You knead bread dough in order to line up the gliadin and glutenin proteins to form gluten, which is strong, rubbery, and perfect for filling with gas from yeast. It also makes the bread more resilient. So, if you want delicate biscuits, you have to avoid developing the gluten, which can occur when you mix the dough too much. Only mix the ingredients until they are barely incorporated. I don’t even roll out my dough (or cut it into shape) because you inevitably end up with scraps that have to be smooshed together and rolled out a second time, making those biscuits tougher.

Simple Drop Biscuit Recipe

  • 2 c flour
  • 1 tbsp baking powder
  • 1/2 tsp salt
  • 1/2 c shortening
  • 3/4 c unsweetened, unflavored “milk” (I usually use almond)

Mix together the dry ingredients and put them in the freezer for 30 minutes. Put the shortening in there, too, and keep the milk in the fridge. I actually just store my flour and shortening in the freezer all the time so I don’t have to wait (this also prevents rancid shortening and flour full of weevils). Once everything is thoroughly cold, cut the shortening into the dry ingredients with a fork, pastry cutter, or food processor, until the shortening is in pea to dime sized bits. Add the milk and stir just until everything is incorporated. The dough will be fairly wet. Spoon chunks of dough onto a cookie sheet–mine are usually about 3 tbsp worth of dough per biscuit. Bake for 10 minutes at 450 F / 230 C.

Part II: Gravy Secrets

Apart from the secret that I shared in this post about the correct ratio for roux to liquid in a gravy, there’s really only one gravy secret for this recipe. Use unsweetened non-dairy milk, almond if you can.

If you’ve ever made a white gravy with regular non-dairy milk, you’ve probably noticed that it turns out strangely sweet–so sweet you can’t really cover it up and make the gravy savory again. This is because, even though it doesn’t really taste like it, all fake milks, including the plain flavors, have a fair amount of sugar in them. That’s great when you’re using these milks on cereal, in smoothies, in cakes, etc. but not when you’re making gravy, Alfredo, or any other savory, creamy sauce. This one thing will make a huge difference in how your gravy turns out.

Creamy Sausage Gravy

  • 1/4 c margarine
  • 1/4 c flour
  • 2 c unsweetened, unflavored “milk” (again, I prefer almond)
  • 1 bouillon cube (fake chicken is best)
  • 1 – 1 1/2 Italian Field Roast sausages, chopped into small pieces or pulsed in a food processor
  • Pepper to taste

Brown the sausage in a pan, making sure to scrape up all the crusty bits on the bottom. In a separate pan, cook together the margarine and flour (roux) for a few minutes on medium-low heat. Cut up the bouillon and add it to the roux (it should melt down a bit). Turn up the heat, add the sausage, and whisk in the milk. Add a little pepper. Once the mixture starts boiling, turn it down to a simmer and cook it until the gravy thickens, whisking often. If the gravy is too thick, add more milk. Serve over hot, margarined biscuits.

This makes two healthy servings, probably with biscuits left over for breakfast dessert (biscuit + margarine + agave).

Peanut Sauce and Carrot Pizza

Tags

, ,

Stop. Let me explain.

This sounds like a healthy pizza. It might be–I’m trying to ignore that. The important thing is that they used to sell it at a restaurant in Calgary, Alberta, and they don’t anymore. This delicious pizza will be lost to the world forever unless people like you, people who care, cherish it in your hearts. Or, like, make it and eat it. If nothing else, it will make your carrots happy.

I’ve gotta keep it brief today so here are my words on this pizza:

  1. Crust: In my opinion, really remarkable homemade pizza crust is rare because it requires good ingredients and/or leaving your dough alone for too damn long. I can’t be bothered. Honestly, I usually just do a ratio of 1 tsp yeast to 1 c flour with 1 scant tsp salt, and however much warm water it takes to get it working. I roll it fairly thin and grease my pan a lot. It does the job. But, I linked you a nicer recipe anyway.
  2. Sauce: You can use any peanut sauce, but the peanut sauce I linked for this is so great and so easy–you just stir it together. I wanted to do a whole You Oughta Know about it and give it and Vegan Yum Yum the lauding they deserve, but I can’t. This sauce is tops, though. (Oh, and I replace the chili oil with chili garlic paste.)
  3. Tofu: This recipe officially calls for Sunrise Soyganic smoked tofu. But, it appears to be a Canadian exclusive, WHICH KILLS ME INSIDE. Do what you can to find another, lesser smoked tofu. I’ve found most baked tofu isn’t a great substitute.
  4. It’s possible you’re going to read these ingredients and be like “…what?” Please just trust me and try this pizza. It is so good.

Peanut Sauce and Carrot Pizza

  • Crust (medium, about 14″)
  • 6-8 large carrots (or 4-6 c), grated on the smaller of the two usual sizes and squeezed to get out much, but not all, of the juice
  • 3 green onions, sliced
  • 1/3-1/2 block smoked tofu, crumbled finely
  • diced fake cheese (about 1/3 block Vegan Gourmet mozzarella is my preference)
  • Peanut Sauce

Make pizza crust, put it on its pan, and cover it with peanut sauce.

Mix shredded carrots, green onions, and smoked tofu. Sprinkle it over the pizza. It should be pretty thick–like 1.5 or more inches of delicious carroty goodness. Sprinkle the cheese over the top. It’s not supposed to fully cover it, just be tasty little morsels here and there. Bake it at the highest setting your oven can manage. This is the best way to bake pizza (some people even bake it on the clean setting). It’s done cooking when the crust is done and the cheese and carrots are browned on top. The carrots won’t be cooked all the way through, but the cheese should be melted. If the carrots and cheese don’t finish at the same time as the crust, put the pizza under the broiler to finish them. If you oiled the top of your crust, don’t put it too close to the broiler, or you will light that pizza on fire. Seriously.

Alright! It’s Friday! Go forth and eat pizza!